The ability to insert a figure in Word is the bane of most people’s existence, and I’ve known many a science writer who switched to LaTeX just for the simplicity of inserting figures.
BUT, inserting figures in Word doesn’t have to be complicated, and once you know how the figures work in Word, it doesn’t have to mess up the formatting of your entire document every time you so much as look sideways at it.
Also, I’ve helped no less than 10 people with this quick technique to insert a figure in Word in the last month alone, and that makes this as good of a time as any to make a post about it!
Video on YouTube
The video for this post is nice and short – in less than 8 minutes, I can teach you just what you need to know to get a figure in your text and how it will behave in your document.
Understanding anchors
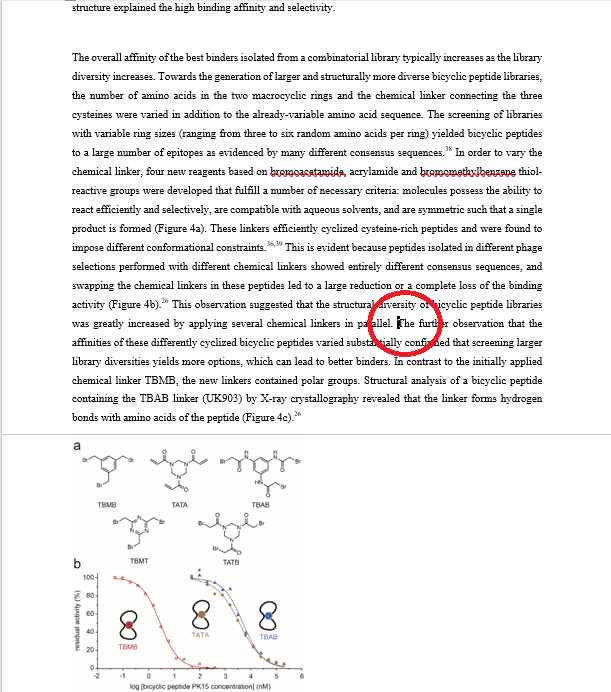
In the example I am going to show, I initially have a figure and caption on its own page:
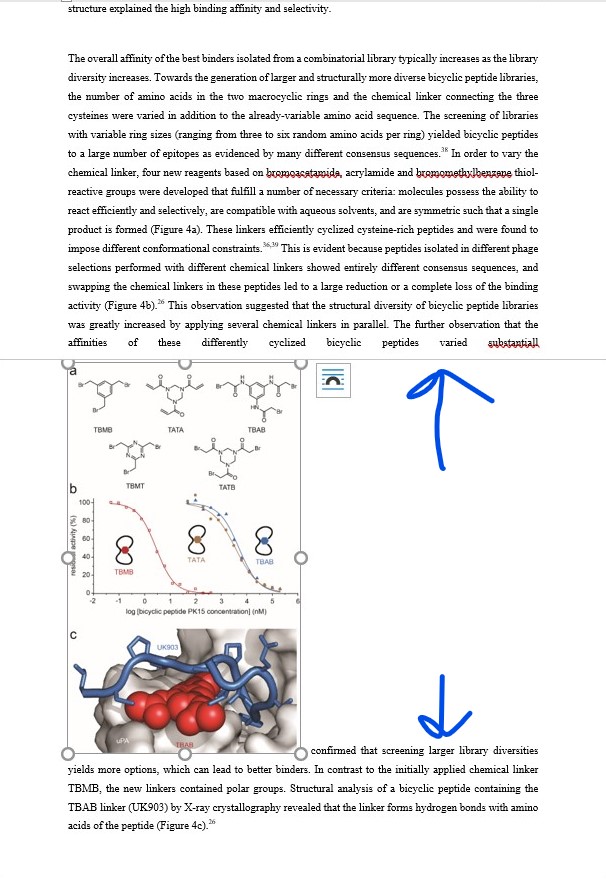
To insert the figure anywhere in the text, just grab the figure with your mouse and drag it to where you want to locate it. This cursor will appear to show you where the figure will be dropped in the text. For maximum chaos, I’ll insert this figure in the middle of a sentence in this paragraph:
Now, though, the figure in in line with the text, meaning that the text isn’t wrapped around the figure, and the figure is splitting the paragraph in two:
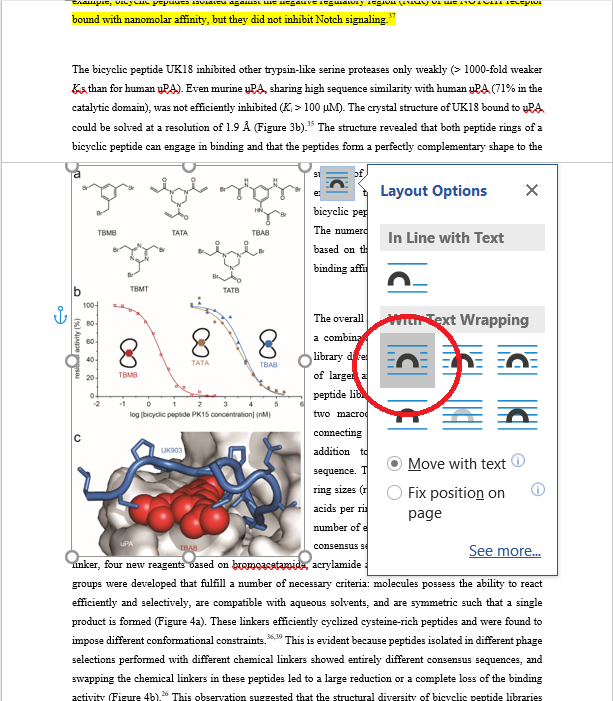
So now we want to click on the figure and change the text wrap using the wrap symbol that will pop up in the upper right-hand corner of the figure. If we click on “square”, the text will wrap squarely around our image, with is the standard setting we want.
Fixing the anchor – key point!
Now we can start to play with the anchor, or what holds our figure in place in the text. When the figure is highlighted, you’ll see this blue anchor appear somewhere in the text on that same page – this is the location in the text where your figure is “anchored” or fixed to the text.
What this anchor text does, your figure does!
This is a key point with figures that people miss and what can mess with your formatting. If this text moves, your figure will move.
Check the video for examples of this text moving. As an example, say you delete a paragraph above this. If there is not enough space for the text AND figure to move, you will just have a chunk of white space here and the text will not move. If you get enough space for this figure to move, the text and figure will jump to the previous page.
You can drag this figure around and move the anchor to exactly where you want it in the text, and the figure will stay in contact with that piece of text.
Keep figure and caption together – use a text box!
Now, though, we have only a figure, and its caption is still below this paragraph, hanging out on its own.
To keep a figure and caption together, I recommend putting them both together in one text box. This text box will act just like an image – it will have an anchor in the text and will move just like a figure, AND it will keep your figure and caption together!
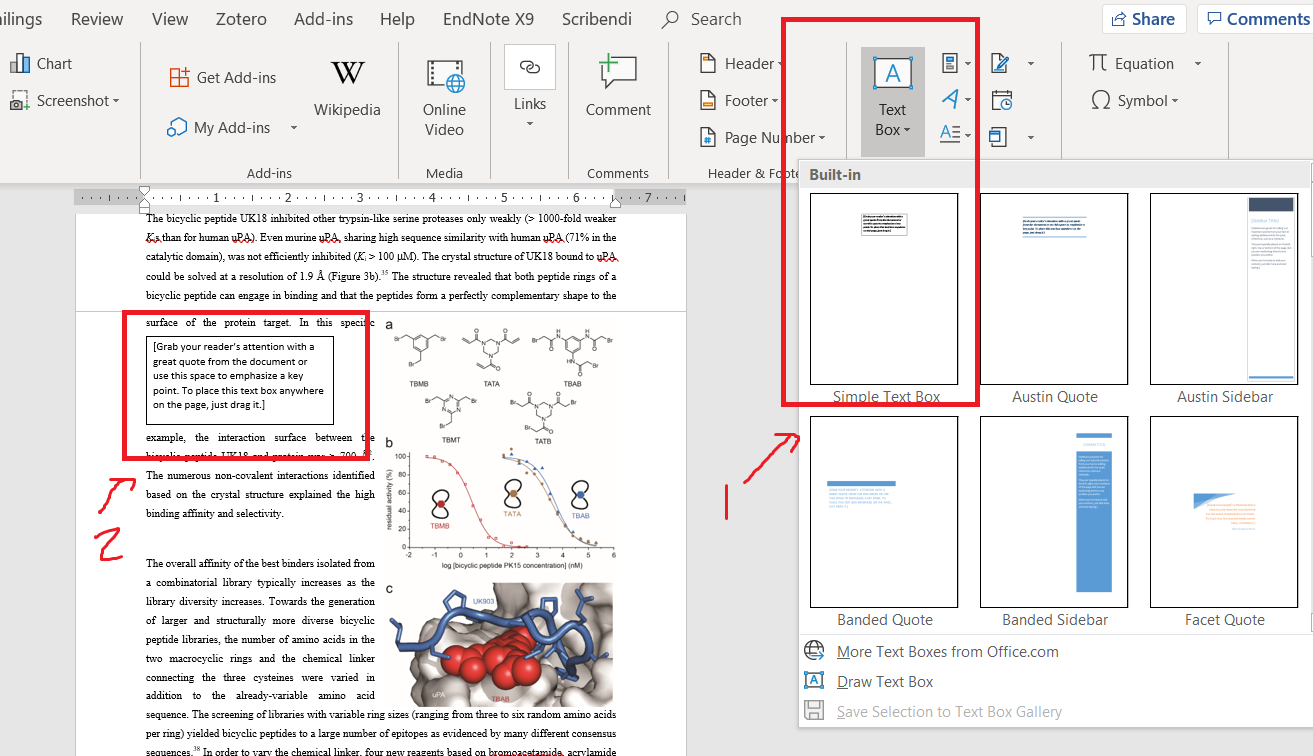
To insert the text box, go to the insert menu and click simple text box (part 1 in the figure below).
A text box will appear in your text (part 2 in the figure below).
Now, make your text box bigger that your figure and caption.
Cut the figure from the text and insert it into the text box.
Cut the caption and insert it into the text box under the figure.
Finally, resize the text box to fit snugly around the figure and caption.
Now your figure and caption are together and can be moved around in your text without the caption getting lost!
The text box has a default black box around it. That can be nice for grants, wherein everything is a bit crammed and the delineation is nice. If you want to remove the box, though, it is as simple as right clicking on the text box and changing the outline to “no outline”.
And there you are! An easy way to insert a figure in Word that helps to keep your figures and captions together and where you want them in your text!
So, how are your figures now? Do you feel better about controlling your figures in your Word documents in the future?
worked fine for a while, but now I get a “you can’t put drawing objects into a text box callout comment footnote or endnote” message every time word tries to save itself… very annoying
Hmm…I’ll look into it! Thanks for letting me know!